Showing posts with label tiny house design. Show all posts

Thursday, July 10, 2014

Tips for designing a small house

Researching sustainable building and small house design can be overwhelming. I have about a dozen notebooks full of floor plans and house drawings I've been scribbling out for over a decade. I was 18 when I picked up my first book on passive solar home design and caught the "I want to build my own house bug," but I wouldn't have the skills, knowledge or ability to do so until my late 20's. In that time I read and researched home design and here are what I consider must-haves for small home design:

Phase building: we'll add a bedroom "wing" on this side
of the house (southern) that will start at the middle
bent and extend to the back of the house

  • Southern Exposure: Orient your structure so that southern exposure is given to one of your two long walls (in the northern hemisphere) to maximize sunlight and warmth in your home in the winter.

  • Eaves: Ample eaves are an important tool of passive solar design, they provide shade from the higher-in-the-sky summer sun but let in light from the sun's lower winter route.
  • Close off the North: Northern walls should have as few openings as possible because they will leak the most heat.
  • Streamline plumbing: If you can design bathroom and kitchen plumbing to share a wall you will save in plumbing supply cost. I was not able to do this in the end but it's still a good tip.
  • Design for building in phases: Our current house is 12x20 but we "built" into the design the entrances to additions we will build on either side of the structure in the future. Avoid running plumbing and electric through these planned entrances.
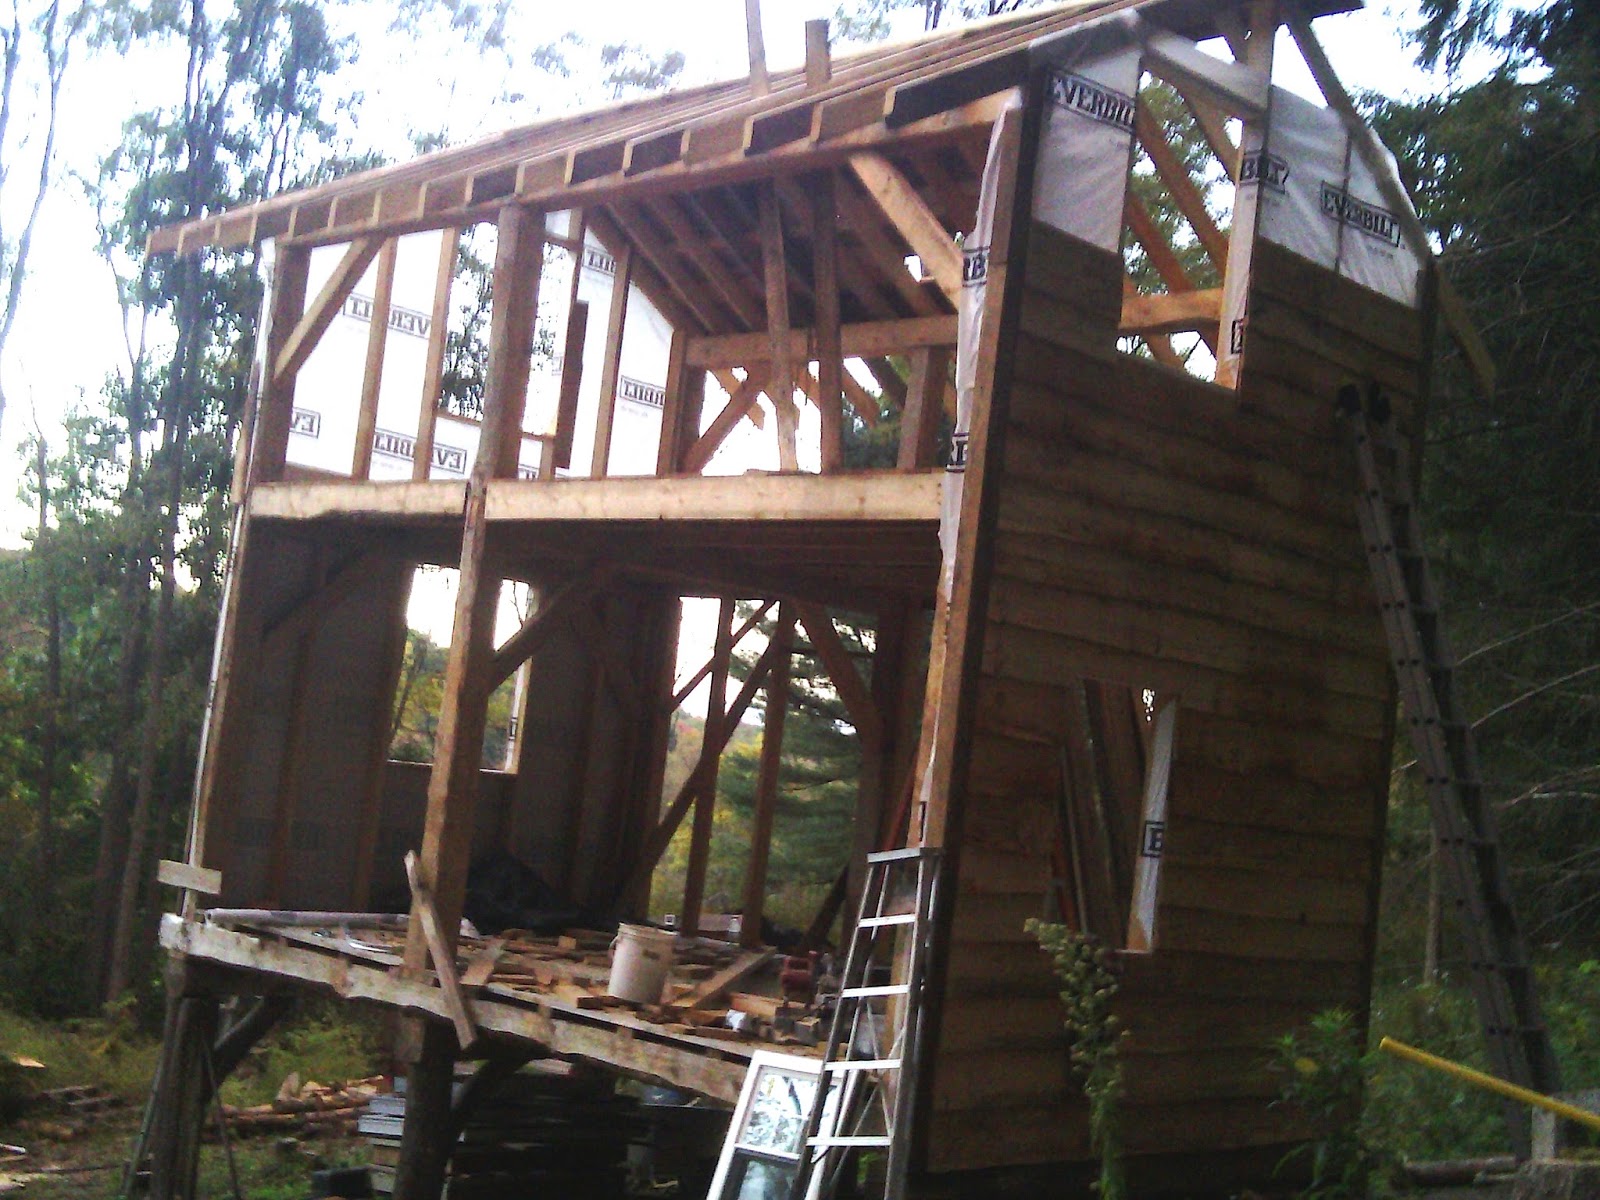
    Phase building: the window on the right will become
    an entryway for the southern addition 
  • Timber framing is especially suited for building in phases because the wall studs can be removed to make an entryway to an addition without impacting the structural integrity provided by the large timber frame bents.
  • Size your insulation: Pay attention to recommended r-values in your area and understand that this will impact how wide your roof rafters and walls should be. In our part of upstate NY R-40 is required in the roof if heating with non-renewable sources. Depending on how you achieve R-40 (rolled insulation, foam board, a combination of the two) you may need to use 10-12" wide roof rafters.
  • You can't have everything: Pay attention to how you live and prioritize space requirements. I spent a lot of energy trying to fit a kitchen, living/sitting room, bathroom and staircase into the first floor. And then we spent a year living in a 9x13 room and realized that we don't need a living room as much as we need a full kitchen and bathroom. So we've got a living room addition planned for down the road.
  • Electric: Knowing how to run an electrical circuit so everything operates normally and knowing how to run an electrical circuit according to code are not the same thing. The code has things such as tamper-resistant GFCI's being required in kitchens but not places more in reach of children. Or the fact that you can't have the kitchen lights on the same circuit as the kitchen appliances. Do some research and you'll be fine.
The Visual Handbook of Building and Remodeling, by Charlie G. Wing, is an excellent resource for all of the above information and more.

Tuesday, June 10, 2014

Timber Frame Construction


We designed our house using Timber Frame Construction: All About Post-and-Beam Building, by Jack Sobon and Roger Schroeder. This book is an excellent resource for the diy timber frame builder so much so that I would say if you only buy one book this should be it.

The authors cover the basics of history, structural type, joinery, and wood and tool selection in easy to follow descriptions that gave us the confidence to build a timber frame home.

Mike adapted the plans for the 12x16 garden tool shed included in the book to a 12x20 structure for our home. We could have built 12x24 without needing to alter the joinery but at the time we didn't like the aesthetics of that size.  In retrospect we would definitely give ourselves the extra four feet if for nothing other than a real staircase, which takes up so much floor space it is the bane of tiny housers the world over.

plans for a 12x16 garden tool shed included in book

One big way to save money for the diy builder is in the house plans.  Our local building code doesn't require an engineer or architect stamp on building plans under 1500 square feet, saving anywhere from a few hundred to a few thousand dollars depending on local rates and how much design time is needed.

The authors give clear instructions for modifying the tool shed design, so there was no guessing on our part as to whether we would need to adjust joinery or timber size to build a larger structure.


These are the bones of our house. I could look at these pictures all day long.

We lengthened the eaves for summer shade and winter light and to keep water as far away from our piers as possible.

We also added almost a full second floor; the side walls of the second story are five feet high but thanks to a 7/12 roof pitch the ceiling rises quickly enough that we don't lose any head space upstairs.


We changed some of the joints on the advice of our timber framing code officer. The rafters, for example, are notched with a birds mouth and then timber locked (heavy duty, kind of pricey "screws" that we also used to lock in the floor joists) in place.  The top plate (horizontal beam on which the rafters sit) are not notched, unlike in the book plans. This saved us some work and we're happy with the result.

So we got some outside help and didn't rely entirely on this book. And we modified the plans a bit to suit our own needs, but the ease with which we did so is part of what makes the book such a great resource.

Buy it, you won't regret it.